Little Witch Academia: Chamber of Time, also known by its original Japanese title, Little Witch Academia: The Magic of Time and the Seven Wonders (リトル・ウィッチアカデミア:時間の魔法と七不思議 Ritoru Witchi Akademia: Toki no Mahou to Nanafushigi) was released in Japan on the Playstation 4 on November 30, 2017[1] (Standard edition for ¥7,600)[2] and was projected to be released in early 2018 on PC[3] before officially being announced to coincide with the PlayStation 4 release outside Japan on May 15, 2018.[4][5] A limited edition version with additional material, including an audio drama and an artbook, will be released in Japan.[2]
Overview
During the summer break from the academy taking place after the exams, a strange phenomenon known as “The Seven Wonders of Luna Nova” begins affecting the school. As Akko, Sucy and Lotte investigate the hundred-year-old anomaly they accidently break the seal on the Horologium Chamber, trapping them in an infinite time loop. They must now escape the loop as they are led to a rumored forbidden magic. [6]
Plot
Prologue: Detention in The First Day of Summer Holiday
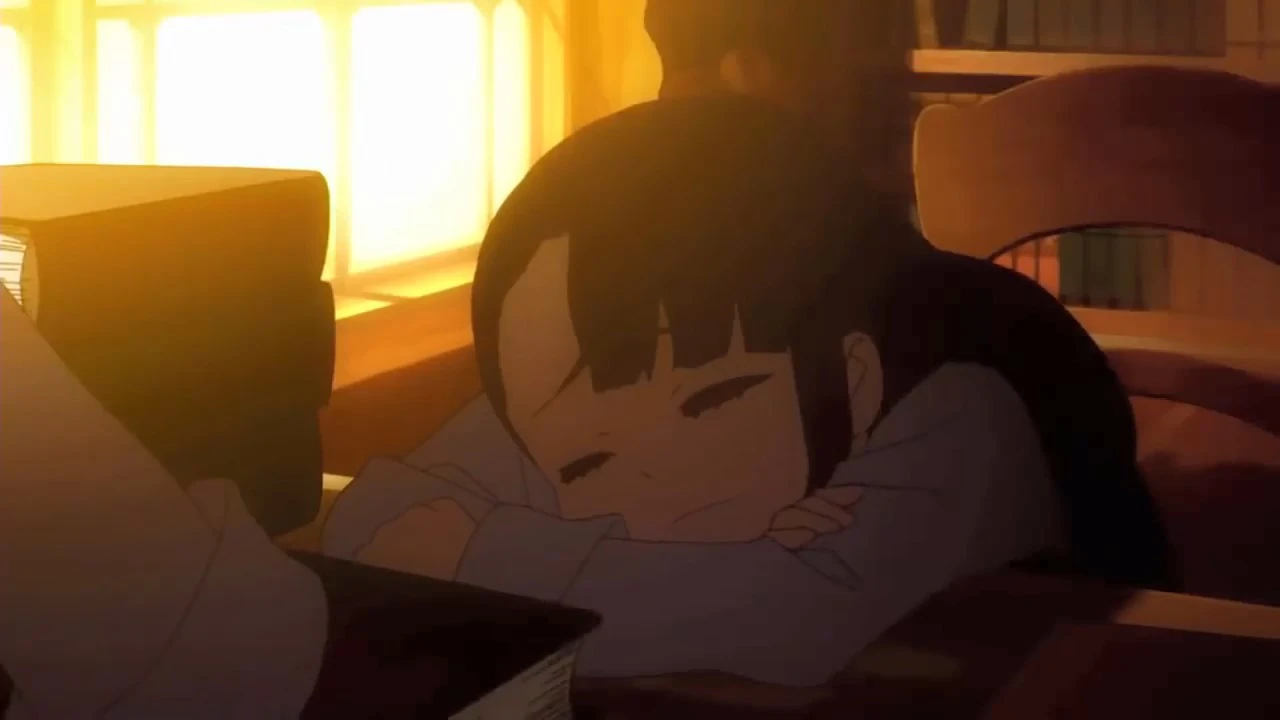
Sleeping Akko and an ominous book
The story begins with Headmistress Holbrooke's speech at the auditorium that lasts until 11.30 AM. Shortly after the speech, Akko, Lotte, and Sucy begin to discuss their plan to spend summer holiday tomorrow: Akko stated that she's going to have private lessons with Professor Ursula in the latter's spare time whereas Lotte visiting her family and Sucy stayed to take care of mushrooms she cultivated at the academy.
Just then, Finnelan summoned Akko to the Student Counseling Office at once. Taking her time on her way to the office, Akko takes a special edition newspaper about Seven Wonders of Luna Nova and met Diana, Hannah, and Barbara along the way, with latter two remarked Akko would likely about to be expelled sooner. There, the grumpy teacher assigned Akko to organize books at the library as a punishment for breaking Academy supplies during Badcock's class prior and she expected it be finished before the end of summer holiday.
Later that night, Akko tells her roommates about her situation. It's revealed that the shenanigan during Badcock's class earlier was the result of Akko reacting from experimental potion Sucy gave to her to wake her up with, leading to disastrous consequences. Lotte breaks up the argument and volunteers to help Akko as well as having Sucy to tag along much to the latter's dismay. Changing topics, the three friends discuss about Seven Wonders of Luna Nova which recently all over the news in the academy. Akko is skeptical about the phenomenon and remarked those who seek to check the event being too curious for their own good, which earned her a sarcastic comment from Sucy who pointed the irony in her words.
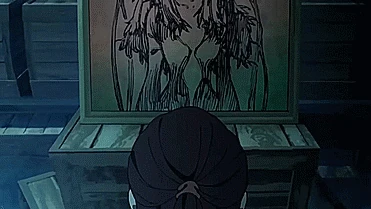
Akko decided to start her detention on the next day and meets the green team (Amanda, Constanze, and Jasminka) who revealed to have plans of their while on her way for the library. She also meets Diana who revealed to be assigned by Finnelan to ensure the Japanese won't slacking off in the middle of her detention, and Professor Ursula who asked her to fix a goblin janitor's cleaning equipment. To her dismay, it's turned out that there are tons of books that must be organized, so much that she can't stand it and ultimately doze off until late afternoon just after putting 3 of the overall books. Little did Akko knows that in her sleep, a mysterious girl appeared and used this opportunity to leave behind an ominous-looking book nearby before disappeared into golden sparks...
Ominous Secret Chamber
Entering the mystery room
Much later, Lotte and Sucy showed up to assist Akko in organizing the books. It is then Akko noticed the ominous book the mysterious girl left behind earlier and, unsure where to put it into, placed it on the nearest bookshelf. To their surprise, this somehow unveils a secret passage which leads to an enigmatic large chamber with a massive ornate door along with a large, hourglass-like crystal contraption. Curious with what lies behind the ornate door, Akko opened it with a key she found inside a nearby box, Canopus Key. Instead of another room, they ended up plummeting into a Ley Line-like abyss which transported them into strange ruins infested by monsters. To Akko's surprise, she managed to use magic without much difficulty as they fight their way back to the mysterious chamber, only to be dismayed that her powers reverted to its original state as soon as they got back. Lotte suggested to tell the professors about their situation, but Akko argued against it out of risk of facing expulsion like the last time. Nevertheless, the three friends decided to call it a day and return to their dorm room for a good night rest.
Little did they know that by disturbing the enigmatic chamber, the three friends somehow subjected themselves into a time loop where the first day of summer constantly repeats itself. Akko is the first to notice the anomaly when Amanda, Constanze, Jasminka, Ursula, and Diana seemingly asked her exact same questions as with in previous day and later, finding the books they put into their respective bookshelves in the library somehow returned to the desks as if they were never disturbed. Originally suspecting it to be a prank, Lotte argued such possibility as the piles looked exactly like the way they were on the other day, and thus the prospect of someone capable of flawlessly recreating the mess is unlikely. As they continue organizing the books, Sucy noticed the secret entrance from previous time loop still open, but the three friends choos e to ignore it for a time being until the day unexpectedly rewinds once again.
Now baffled with their current predicament, the three friends decided to investigate the mysterious chamber they just find for answers. Before they could begin, Amanda, Constanze, and Jasminka unexpectedly enter the chamber, originally curious with what Akko is up to at the library until they stumbled upon the secret chamber's exposed entrance. To Akko's dismay, they soon followed by Diana who noticed something off in Akko when she bumped into her earlier. After Akko reluctantly tells them their situation, Diana deduced the secret chamber being the legendary Horologium Chamber and considered to tell the professors about this discovery, prompting Akko to object such idea since she already had enough troubles in her hands. Amanda on the other hand, is intrigued by the dungeons Akko mentioned instead. The group then waited to see whether Amanda, Constanze, Jasminka, and Diana will retain their memories pertaining that day's events in the next time loop.
On the next loop, the green team and Diana confirmed Akko's statements and that they too, stuck in the time loop as much as the Japanese, Lotte, and Sucy. Once the group are gathered inside Horologium Chamber, Diana revealed to everyone what she learned about the Chamber through her studies and even found a lesser version of the Magic Key Akko used on the Chamber's Sealed Door in the previous loop (Canopus Key) along the way; Horologium Chamber is a special chamber which contains the power over time itself and the time loop they currently trapped within had something to do with said power. As Akko and co. are about to begin an expedition with the Key Diana just found, Diana restored the magic sigil in front of the Chamber's Sealed Door, revealing it to be a teleportation circle which allows three people in maximum who entered any of Horologium Chamber's dungeons to return. The Cavendish noted to Akko that she and her roommates were lucky in their previous exploration, as they managed to get back in one piece despite of it was broken.
Horologium Chamber Investigation
The 1st Seven Wonder: The Cursed Doll
Akko being used as guinea pig for another experiment
When Akko, Constanze, and Sucy examining the giant clock, Sucy suggested Akko to ask Carmen for some bittershrooms. As Akko acquires the bittershroom, she overheard some students talking about a cursed doll who appeared at the courtyard in the night and out of curiosity, decided to confirm it. To her and Amanda (who also intrigued by the rumor)'s dismay, the cursed doll not appeared at all, though the latter stated that Sucy being known witness of the doll: It's revealed that the alleged cursed doll's sightings at the courtyard was ceased due to it now in Sucy's possession. Sucy revealed to Akko her intention to use the doll, along with the bittershroom Akko acquired and a strand of Akko's hair for a certain experiment, much to Akko's fury.
To both girls' surprise, the alleged cursed doll contains what appeared to be a second Magic Key, which led to a dungeon in form of a forest called Mimosa Forest. Even Diana also incredulous by the news, before updating the group about Horologium Chamber: There are numerous similar keys scattered all over Luna Nova. With that, the group decided to embark on the new dungeon which resembles Arcturus Forest in many ways except it enveloped by pinkish fog. There, they defeated the Treant, tree-like monster that inhabit the forest. The girls then collected the fallen monster's sap, which then Constanze used to successfully fix the clock without a word. The delighted Akko believed that the time loop finally ends with the clock of Horologium Chamber now fixed and worked once again, only to be dismayed that it doesn't affect the time loop at all and blamed Diana for proposing that theory.
The disgruntled Akko then meets Amanda who revealed that she found a magic key which led to another dungeon called Mountain Ankaa, though the one she found being a lesser key instead of the main one. Suddenly, just as she accepted the new key, Akko suddenly yelped out of spontatenous sensation of bitterness in her mouth, startling Amanda in process. The furious Akko growled that it surely have something to do with Sucy, in which the confused Amanda stated that she just saw the Manbavaran in the courtyard. Sure enough, it prompts Akko to run for her mischievous roommate and yelled what she had done to deserve it. Instead of answering, Sucy poured a bit of her experimental potion (which brewed out of extract of bittershroom) onto the cursed doll that had been linked with Akko's very being via some sort of voodoo magic, knocking the Japanese young witch in that instant.
The 2nd Seven Wonder: The UFO


Akko sees the alleged UFO
After things calmed down a bit, Sucy tells Akko about sightings of alleged UFO believed to be one of Seven Wonders, but suggested her to go for the laboratory for more info. Learning more about the UFO from a group of students at the lab, Akko set out for the school's western lookout that night. After waiting for a few moments in western lookout, she spotted a green small light which heads toward the school yard, prompting the Japanese young witch to make haste for taking a closer look on it. Unfortunately, as soon as she get close to the supposed UFO, the green light flew away, much to her dismay.

Akko, Lotte, and Horologium Clock's spirit
On the next time loop, Akko consults with Lotte about the UFO when she summons the spirit of Horologium's Great Clock. Through information gained from the said spirit, Lotte explained that they need binding glue to seal the Horologium Chamber as fixing the clock won't be enough to undo the time loop. Akko then decided to consult with Ursula and later, Professor Lukic for that matter, all while keeping their actual reason for the magical adhesive a secret from both. From Lukic, Akko learned that the binding glue is made of 3 mandrake leaves, 3 miniature dragon fangs, and cornstarch (which actually raw corns). Akko managed to acquire some cornstarch at the aviary (in spite of initially caught by Badcock which prompt her to made another attempt in the morning on the next time loop), which leaves the rest at Mimosa Forest and Mountain Ankaa respectively.

UFO revealed
Taking her time in acquiring the rest of the ingredients, Akko decided to use Telepathy Magic on the mysterious green light at the school yard as her conversation with Lotte made her suspecting that the alleged UFO might actually some random old object that flying due to possessed by its spirit. As she suspected, when her Telepathy Magic spell reaches the green light, the alleged UFO crashed on the ground and revealed itself to be an old kettle possessed by a spirit. To her surprise, the kettle's spirit revealed another Magic Key inside its kettle: apparently, it tried to remove the key to no avail entire night, where the process inadvertently making news at Luna Nova in form of UFO sightings. With the key now removed from the kettle, it now reduced into ordinary old kettle once again.
After gathered the rest of the ingredients, Akko gives them all to Professor Lukic so she can make the Binding Glue for her. To her dismay, instead of complete Binding Glue, Lukic gives her the incomplete magical glue as there's still one missing ingredient: Few drops of Blood of Cerberus. The eccentric elderly professor deliberately not mentioned such important detail because she can't simply entrusting inexperienced students some powerful magical substance. This prompted Akko to consult with Lotte about the creature and why she need its blood, in which the Finnish young witch explained that Cerberus are demonic 3-headed hounds known as Guardian of Hell due to live at volcanic region of Mountain Ankaa.
Since Akko has the main Magic Key for Mountain Ankaa in her possesion, she gathered the rest of the gang for the next expedition. During this point, Diana begins to suspect that Horologium Chamber was sealed for a reason, but dangers posed by different regions accessible from Horologium's Sealed Door is not plausible enough. Nevertheless, the gang begins their expedition for the Cerberus at Mountain Ankaa.
The three-headed beast proved to be a formidable foe, but the girls finally able to defeat in and acquired some samples of its blood. With that, the gang returns to Horologium Chamber with Sucy helped completed the Binding Glue. While Akko and Lotte believes that the glue will help breaking the time loop, Amanda felt skeptical whether it will work. Akko insisted that it will this time, though she started to feel bad in sealing Horologium Chamber due to her now become attached to it. With the Binding Glue now completed, Akko applied the Binding Glue on Horologium Chamber 's entrance, sealing it. Satisfied at first, Akko realized that she forgot something, in which Diana reminds her about her detention from Finnelan. Fortunately for Akko, Lotte and reluctant Sucy offered some help for arranging the books before they can enjoy their summer holiday.
After Akko and co. left, the mysterious girl who tricked Akko to unseal Horologium Chamber from the shadows, appeared out of nowhere before proceeds to magically dispose the Binding Glue applied on the Chamber's entrance, unlocking it once again...
Magic Key Investigation
The 3rd Seven Wonder: Hands From The Ground
Akko evading the hands
Continuing the investigation, Lotte tells Akko about a legendary timepiece called the "Magichron", magic-powered clock that able to turn back time, but skeptical whether such device exist. Akko reassured that it indeed real and might hidden somewhere in one of regions of Sealed Door, and thus set out to focus the investigation on the Magic Keys, starting by asking others around. Entering the lab, she overheard Abigail talking about another of Seven Wonders, this time hands that popping out from the ground. Asking the info from Abigail, Akko learned than the first witness was Henrietta, who had the hands grab her when she watering plants in the botanical garden, but managed to escape because the hands disappeared after grabbing her for a hour. However, by the time Akko arrived at Botanical Garden, a troll custodian had secured the area, apparently due to the news had been spread and he immediately tasked to prevent future accidents.
Akko then decided to consult with Sucy, where the Manbavaran wondering whether the hands might a new kind of mushroom. Though dismayed that they are not new mushrooms, Sucy suggested Akko to use sleep magic on the Troll custodian with help of some potions sold at the academy store and even gives her another Lesser Key of Pollux she found when looking for mushrooms. With new magic potion at hand, Akko put the troll custodian to sleep and sneak into the garden. To her shock, as soon as she enter the botanical garden, the transparent hands Henrietta mentioned earlier suddenly pops out and grab her legs. The terrified Akko managed to escape their graps, and it appeared the hands seem to prevent her from getting closer to Jennifer Memoriam Tree for some reasons. Since flying is the sole solution for the matter, Akko consulted with Holbrooke about spell similar to Flight Magic, which turned out to be Levitation Spell with same incantation with the former.
On the next time loop, Akko utilized Levitation Spell to get past the hands, and lands near Jennifer Memoriam Tree, the only spot that not infested by arms. There, she found a new magic key, Regulus Key, which upon disturbed, dispersing the hands in an instant. This made Akko suspicious that the said wonder being caused by the said key and decided to tell her friends about it at Horologium Chamber. Upon hearing her story, Diana concluded that it leaves 3 more missing magic keys, as she had confirmed that there are indeed seven regions that accessible through Sealed Door. With that, the group set out for the next region, Regulus Mine.
The 4th Seven Wonder: The Wet Chair

Fixing the weather ball
The gang eventually found the taled Magichron deep in Regulus Mines, but the device cannot work due to lack of enough magic power. Lotte suggested to check on Academy Store to see whether they sell a spellgem. At the store, Akko meets Badcock and consulted with her about spellgem which store greater amount of magic power than regular magic batteries, which confused the professor who stated that the school cannot provide such spellgem due to financial constraints. Akko then decided to ask Diana instead, where the Cavendish revealed that she instead found one of Lesser Magic Keys which led to Gienah Tundra at the cafeteria, prompting Akko to ask her for some exploring with the new key. Afterwards, Diana recalled on rumors at cafeteria, which this time about another Wonder: A chair that constantly wet for reasons unknown.
Examining the wet chair herself, Akko compared it with ghost stories about someone who taking a taxi before mysteriously disappeared, leaving nothing but a wet seat when she suddenly feels a brief sensation of water dripping on her head. This led to her suspecting that this unusual phenomenon might caused by the leak from a possible water source above the cafeteria. Akko then inquired Ursula whether she can see what lies above the cafeteria from her office. Ursula explained that the only things situated above being Nine Witches' Hall and Weather Ball fountain, making her suspecting the latter as the source of the leak. Unfortunately, as soon as she entered Nine Witches' Hall, she unexpectedly stumbled upon Finnelan who inquired her about her detention's progress, forcing her to abruptly left.
Coincidently, as she pondering about the way to either avoid or distract Finnelan on the next time loop, Akko meets Nelson who asks her to report to Finnelan regarding broken bath in faculty residence on her behalf. The news excited Akko that she immediately set out to do it, much to Nelson's confusion who oblivious with Akko's actual motives. Entering Nine Witches' Hall, Akko tells Finnelan about the problem, which dismayed the strict professor as the bath turned out very old and needs a serious renovation. Nevertheless, Finnelan reminds Akko about her detention and left, leaving Akko the access for the Weather Ball fountain. Examining the fountain, Akko figured out that something has clogged it, resulting the leak which inadvertently created the alleged 4th Wonder, and thus need to be fixed. Thankfully, she still has some supply of mending magic potion in her disposal and used it to repair the clog. At first, the spell seemingly had no effect on the Weather Ball's cube for a moment before abruptly explodes into a large amount of water before returns to normal, soaking Akko in process. To the Japanese's relief, the fountain is finally working again just as something suddenly lands on her head; another Magic Key which this time, allows the access for Shaula Desert.
The Shaula Key's presence make Akko suspicious whether the Seven Wonders has something to do witb the scattered main 7 Magic Keys, which prompts her to gather the rest of the gang in Horologium Chamber and starts the meeting over the recent events. While questioning how Akko get the access for the Weather Ball, Diana suspecting that there's a definite correlative connection between Seven Wonders and Magic Keys. Nevertheless, the witches decided to start another expedition, this time to Shaula Desert. The expedition proved to be fruitful as the girls are in fact, found one of Magichron's missing spellstones. To Akko's dismay however, the Magichron still not working with Diana pointed out it still needs one more spellstone, which still missing.
The 5th Seven Wonder: The Running Skeleton

Akko vs. Animated Skeleton model
After a good exploration, Amanda tells Akko about another wonder, which this time, in form of a running skeleton model mentioned by a student in the classroom on the second floor. This earned her a tease from Akko who remark that she finally tells her an useful info. Questioning the said student, Elfriede, Akko learned that the alleged running skeleton showed up around ten at night, running around the grounds while laughing. To clarify the sighting, Akko sets out for the School Grounds around the same hours Elfriede witnessed the skeleton that night. To her surprise, the running skeleton, which appears in the School Grounds as Elfriede said, turned out surprisingly fast and agile, as it swiftly evades her in her attempts to capture it to no avail. To compound the issue, when Akko thrown out her sash on the skeleton with her wand as sort of makeshift hook, it ended up dragged her throughout entire lap of the area until she lost her grip and fell, much to her frustration.
On the next time loop, Akko tells Lotte about her ordeal with the running skeleton. Hearing her story, Lotte suspects that the said skeleton might the same one in Lukic's class. This prompts Akko to hastily inquired the elderly professor about it, only for the professor herself surprised that the said skeleton missing. Lukic did however, recalled that she put the skeleton in a medicinal bath she drew on the other day, claiming it wonders for joint pain so awful that "you can bend them all backwards after a good soak". Akko then asked her how to stop a running skeleton, in which Lukic suggested to use control magic.

Animated Skeleton's humorous end
Following Lukic's suggestion, Akko prepared herself with some control magic potion and make another attempt in capturing the running skeleton. Maintaining her distance with the skeleton, Akko casts the control magic spell on it, immobilizing the skeleton on the spot. The Japanese young witch at first, confused why the skeleton seemingly not resisting the spell before decided to take a closer look on it. Predictably the skeleton immediately spring to life near her presence, but due to the spell Akko casted earlier, it ended up blown itself into pieces, with its intact skull comically lands on Akko's face and bites her nose in process. The bemused Akko is about to toss the disembodied skull model before noticing something inside it. Upon inspection, the skull turned out has another magic key inside it, which this time, for the access to Gienah Tundra. Bewildered that this phenomena also caused by another Magic Key, Akko decided to held the meeting with others at Horologium Chamber.
Akko's story about the running skeleton model confused Diana, who wondering how the key ended up inside its skull to begin with. The terrified Jasminka even wondering whether the skeleton ate the Magic Key. Diana then comes up with another theory regarding the magic keys and their connection to 7 locations accessible through Sealed Door reflecting on recent events. With another magic key in their possession, Akko and the gang set out for Gienah Tundra for another expedition.
The expedition at Gienah Tundra proved fruitful with Akko and co. found the second missing Spellgem for Magichron. Completing the device, it suddenly blinds everyone with bright light. The next thing that happened, Akko found herself back to the exact same moment before she unknowingly unlocked Horologium Chamber, with Akko herself wondering whether her prior adventures was a dream all along. At that point, the accidental unsealing of Horologium Chamber by Akko seemingly averted with neither of her, Lotte, and Sucy barely remember their recent adventures, and neither of them disturb the ominous book the mysterious girl left behind. However, there are still some loose ends, as once again, the mysterious girl who masterminded the whole thing unlocked Horologium Chamber once again...
Sealed Door Investigation
The 6th Seven Wonder: Faceless Portrait
You're busted, Akko!
Finding herself back to the time loop, Akko begins to wonder about what actually lies behind the Sealed Door aside 7 regions which require magic keys to access themz. Entering Horologium Chamber, Akko surprised that no one except Diana present in the room. At that moment, Diana is researching some info about an entity called Time Demon said to be imprisoned at a labyrinth-like prison. Hearing that the demonic entity has the power over time itself, Akko, without thinking twice, set out to investigate more about it in spite of Diana's protest.
When looking for more info about the Time Demon, Akko overheard Avery, Blair, and Mary talking about another Wonder; The Faceless Portrait. Inquiring the three girls about it, Akko learns about an alleged faceless portrait which eyes said to glowing in the night. The said portrait was hanged at a classroom (Class 3-1) in the third floor, but according to Blair, the portrait has been removed very recently. This prompts Akko to go for the said classroom to clarify the rumor where she meets Lotte there, who dismayed that the portrait has been moved. With both of them confused whether the faceless portrait indeed exist, Akko decided to ask Headmistress Holbrooke about it. From the Headmistress, Akko learned about a professor of magical art who suddenly transferred away some time prior to the first day of summer holiday and left behind a painting she had yet to complete in process. Akko deduced that the painting and the faceless portrait might one in the same, in which Holbrooke suggested to ask Finnelan to confirm it.
Narrowly avoiding an unnecessary misunderstanding, Akko learned from Finnelan that she had Hannah and Barbara moved the faceless portrait to the storage to avoid commotion over it, all while wondering how everyone believed the alleged Seven Wonders. Once again, Finnelan reminds Akko about the detention as she about to make her leave. Unfortunately, the storage's door was locked, and Akko deduced that Hannah and Barbara might still have the key in their possession. Just then, she meets Constanze who gives her another lesser Regulus Key to ask her in accompanying her for another expedition.
After a small expedition with Constanze, Akko goes for Hannah and Barbara and inquired them whether they have the storeroom key. Barbara recalled that they yet to return it to Finnelan, which prompts Akko to offer them to return the key on their behalf. However, this earned her suspicion from the two, who then teased her about her detention, much to the Japanese young witch's dismay and fury that she forced to left. Just then, she met Amanda and complained over the two girls' treatment to her compared to theirs with Diana, in which Amanda remarked that the two are indeed Diana's loyal underlings, and thus suggested Akko to disguise herself as Diana via. metamorphosis magic. Recalling that Badcock is in charge of such magic and her skill in it still relatively poor, Akko decided to consult her about it for solutions. From Badcock, Akko learned that using metamorphosis magic to assume the appearance of someone else is more difficult than animal forms, and usually require item the person in question always carry around with them to work. Now fully understood the complex level of metamorphosis magic, Akko decided to find Diana.
Upon meeting Diana, Akko inquired her about what she usually carry around her, at which Diana stated that it's her handkerchief before left to clear her mind. This prompts Akko to stalk on her all the way to the courtyard. Pretending to be sweaty, Akko asks Diana to lend her her handkerchief which hilariously, earns her suspicion from the Cavendish through her poor acting, prompting her to flee from the scene. Fortunately, after hiding somewhere around the courtyard, though Akko lost Diana, she nevertheless found her handkerchief, which leaves confronting Hannah and Barbara while disguising as Diana.

The painting reveals the key
However, disguising as Diana with metamorphosis magic just to get the storeroom key from Hannah and Barbara turned out never a bright idea from the beginning, as Akko barely stays in character and by she left the two alone, the real Diana busted her and chewed her for both assuming her form without her consent and demanded her missing handkerchief. In spite of this, Akko finally able to get her hands on the key for the storeroom where the unfinished painting being kept at. Examining the portrait, which revealed to be the painting of Woodward (albeit with eyes, nose, and mouth missing due to still incomplete), one of Nine Olde Witches, Akko sees nothing unusual on it and decided to return once the night comes. As she predicted, the painting's right eye seemingly glow later that night. However, upon closer inspection, Akko realized that the glow on the painting's eyes is actually the moonlight reflected by something near the window; the final missing Magic Key, Pollux Key. Discovering the key, Akko gathered everyone at Horologium Chamber and explained how she found it. After remarking that Akko would've avoid unnecessary troubles by asking her instead of disguising as her, Diana asked Akko how many keys she found when entering Horologium Chamber for the first time, in which Akko barely remember of. Nevertheless, the gang set out for the 7th region, Labyrinth of Pollux.
Finding the key, she gathered everyone at Horologium Chamber and explained how she got the key in the first place. Diana asks Akko how many keys she found when she entered Horologium Chamber for the first time. Akko barely remember how many, but nevertheless decided that they will start another expedition, this time to Labyrinth of Pollux.
The Time Demon

The roaring Time Demon
In contrast of previous regions, Labyrinth of Pollux turned out to be more complex than even Mimosa Forest, as Akko and co. must find levers in order to open the gates to further explore the area. To compound the issue, they encountered a gigantic monster that strikingly resemble a titan albeit twice the size with blue meridian glow which seemingly unkillable, forcing the group to retreat and focus on finding the way to break the time loop instead. Continuing the investigation, Diana stumbled upon an article about an entity called Time Demon said to possess power over the time itself. Excited, Akko makes a haste to ask around about it and meets Jasminka along the way, who revealed another lesser Shaula Key she found as a present in her snack. With another lesser Magic Key being found, Akko decided to take her time exploring the new region in Shaula Desert with Jasminka and inquired her about the Time Demon as soon as they finish exploring. To her dismay, Jasminka turned out know nothing about the Time Demon, but nevertheless suggested Akko to ask the professors instead.
As per Jasminka's suggestion, Akko decided to inquire the professors starting from Lukic since she most familiar with the occult out of her peers. While dismayed that Lukic also know little about the Time Demon, Akko nevertheless warned by the eccentric elderly professor about dangers of dealing with the demons; they will tempt those who communicate with them the promise of granting a wish at a price that obviously not pretty. Akko then proceeds to consult with Headmistress Holbrooke, who happened to be in a good mood from finding a perfect pair of boots in a catalog large enough to be worn as a hat. Upon inquired about the Time Demon, Holbrooke reveals her familiarity regarding its lore, elaborating that the Time Demon indeed has the power to manipulate time true to its namesake and because of it, the demon sealed itself away inside a labyrinth to hide from those who sought to exploit its powers. When Akko inquired her about the way to earn its respect, Holbrooke refused to tell her about it, stating that meddling with time is almost as bad as necromancy, but nevertheless suggested Akko to inquire Ursula regarding a book which might provide her more info about the Time Demon. Upon meeting Ursula and inquired her about the said book, the astronomy teacher suggested Book of Chronos, while wondering why Akko interested with such complex topic.
Returning to Diana, Akko tells the prodigy about the book that they need to learn more about the Time Demon. Hilarously, in doing so, Akko mispronounced the said book as the Book of Chloris, prompting Diana to correct her mistake. Browsing information within the Book of Chronos together, the girls learned that the Time Demon will led his ear only to those who bear an amulet called Talisman of Time. The talismant itself is made of a minotaur horn, a screamer core, a witch's lip petal, and some enchanted starch, and creating one won't be easy as they still require some missing ingredients and suggested Akko to let her know if she need some help, much to Akko's delight.
After acquiring the rest of remaining materials in addition of ones she already had in her possession (a witch's lip petal from Ester at Botanical Garden and enchanted starch from Pisces), Akko gives them all to Diana and started to work on the talisman. Once the talisman completed and ready to go, Akko called for the rest of the gang to confront the titan-like creature once again. It was a difficult battle like in the previous confrontation, but thanks to Talisman of Time in their possession, they managed to best the gigantic entity and even defeated it in combat. To the witches' shock, the titan-like creature turned out to be the manifestation of the Time Demon himself, who impressed with their worth as he made his presence known at the hall of Horologium Chamber, startling Akko in process. The Time Demon, appearing as telepathic voices inside the witches' heads, proposes a tempting offer to grant them anything their wish. Sucy, without thinking twice, cried out for the demon to bring her something poisonous only for Akko gagged her mouth at the last moments, having warned by Lukic about dangers of making deal with a demon beforehand. Struggling to keep her eccentric roommate quiet, Akko hastily inquired the Time Demon to restore the flow of time. The Time Demon confidently replied that it is a simple task, before abruptly took a fragment of her memories in return as the payment and blinds everyone with a bright light just like the Magichron did.
A while later, Akko found herself awakened back at the desk where she slept at before accidently unsealed the Horologium Chamber, though this time, she, Lotte, and Sucy are not alone in the library: Diana, Amanda, Constanze, and Jasminka also there, ready to help Akko arranging the books. While everyone believed that their crisis have come to pass and begin to work in helping Akko, Diana ponders that they might have missed something – Of course, the mastermind behind the unsealing of Horologium Chamber still on the loose, as once everyone gone, she unsealed the Horologium Chamber once again, all while undoing the deal Akko and co. made with the Time Demon and returned the memories the demon taken from her through the said deal in process...
The Final Seven Wonder: The Ghost in the Library
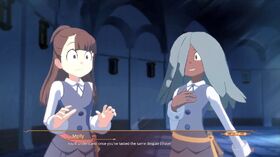
The Curious Molly

After having a series of flashbacks about her recent adventures since accidental unsealing of the Horologium Chamber, Akko found herself awakened at the sofa in the hall of Horologium Chamber itself, surrounded by her friends who now out of options regarding their next course of action with Diana reviewing their progress up until the failed pact with the Time Demon. While dismayed that all their efforts to break the time loop seemingly ended in vain, Akko nevertheless inquired the prodigy what bothering her lately. Diana unexpectedly replied by asking Akko about the Seven Wonders and what they all shared in common, leading Akko to realize that all of them were caused by the Magic Keys. With 6 of the overall Wonders have been discovered and solved, it leaves the final one that they overlook: The Ghost in the Library. Diana suspects that there's something more in the Final Wonder, with Akko adding that they already have complete set of 7 main Magic Keys in their possession (including the one which led to Canopus Ruins, the gang's first region).
As she wondering whether the Final Wonder has been all over the news around Luna Nova, Akko accidently collide with a mysterious, insecure blue-haired girl named Molly. After introducing themselves to each other, Molly complimented Akko being famous for sort of things before Akko inquired her whether she know something about the ghost in the library. Molly, who intrigued with the Seven Wonders, explained that the ghost was once a student of Luna Nova who terrible in magic and attended the school during the Golden Age of Magic. Delighted, Akko tells Molly to let her know if she learned more about the Final Wonder as they parted ways, only to stopped in her tracks as she realized something amiss in Molly as soon as Molly gone. Nevertheless, Akko shrugs it off and meets Amanda, who also looking for more info about the Final Wonder. Instead of useful information (with exception of the ghost vanishes once she leaves the library), Akko ended up teased by the troublemaker who stated that she will be possessed by the ghost at the library as both her and the ghost are poor in magic, much to Akko's irritation.
Returning to the library, Akko tells Lotte what she learned so far, in which the Finnish young witch commented it similar with Invisibility Magic. Lotte then suggested Akko to revisit other Seven Wonder locationd for more leads as in murder mysteries, "the culprit always returns to the scene of the crime." With no other options available, Akko decided to visit each locations where the alleged Seven Wonders take place where in each visit, she has recurring encounter with Molly who voiced her opinion about each Wonders:
- The alleged cursed doll might actually some random spirit/fairy dancing in the middle of the night and mistaken as a dancing doll by the witnesses.
- The alleged UFO sighting was popularized by infamous cases of cattle mutilation allegedly perpetrated by the aliens, and thus Molly humorously warned Akko to be careful so they won't mistaken her as a cow.
- The sighting of running skeleton might only famous enough as a ghost story, and thus need extra hook to become actual Wonder.
- Hands that growing on the ground might actually made up by someone who imagined a dead body buried beneath Botanical Garden.
- The chair that constantly wet might be an overly exaggerated story made by someone around their age.
- The story about faceless portrait that glow in the night was likely a hoax made by someone who take advantage on an ordinary unfinished painting.
Checking the library in the night (09.00 PM) for the Final Wonder, Akko sees nothing out of ordinary in the area. The Japanese mused that the alleged ghost in the library didn't attract much attention unlike the previous Wonders even though the said ghost had appeared enough times to cause a rumor. With no leads in the room, Akko decided to continue investigating in the next time loop.
The Return of The Dreaded Ghost Witch
Molly unveils her true color
Things appeared to be normal in the next time loop when Amanda showed up just as Akko entered the hall of Horologium Chamber. Bringing the Japanese to the second floor of the West Dormitory with her, Amanda intended to show Akko a huge argument between the three girls she claimed to be so tense that they looked "ready to tear each other to pieces" only to find the third girl already gone, leaving remaining two that very angry from the said fight. Naturally, Akko doesn't take this seriously as it might be caused by trivial reasons, but nevertheless decided to eavasdropping on the two girls' rants and asked them. To her surprise, the two angry girls are revealed to be Molly's roommates Elsa and Amelia and apparently, Molly mocked Elsa's dream to become the teacher in Luna Nova, going so far stating that all of Luna Nova's professors are stupid and should quit before wasting their students' time. Whereas Akko found Molly's behavior during their argument seemed to be out of character, neither Elsa nor Amelia are care if they wouldn't see her again.
Worried about Molly's well-being, Akko decided to look for her by asking the rest of the gang one by one. To her dismay, neither of them know Molly's whereabouts that after tirelessly looked for her until the sun sets, Akko cried out in frustration at Cafeteria Vestibule. Fortunately, as she did, Akko meets Lotte who claimed that she saw Molly heading up to the observatory, prompting Akko to make haste in chasing her, leaving the confused Finnish behind.
Finding Molly, Akko inquired her about awful things she had just said to her roommates, believing her unusual behavior might be due to her upset because her dreams being made fun of. The blue-haired girl however, for some reasons, responded by stating that Akko doesn't know anything about her. Their conversation attracted the attention of Ursula who inquired them whether everything is okay, but for some reasons, she had trouble in recognizing Molly. Molly then used the opportunity to make her leave, leaving the dismayed Akko who then called Ursula out for not remembering Molly's name before gives chase.
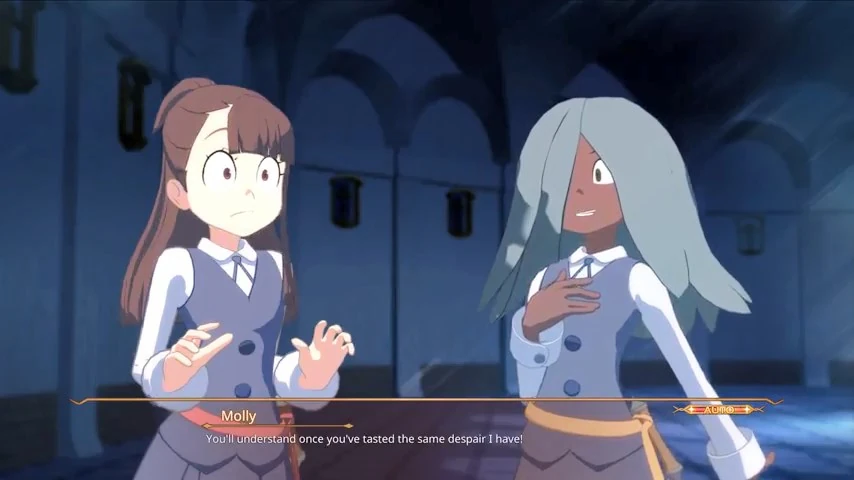
Catching up with Molly in front of the library, Akko begged her to forgive Ursula for not remembering her name, but once again, she responded not in the way Akko expected: Molly remarked Akko being full of surprises before stating that she's going to "do it right". Akko's confusion grows when she unexpectedly expressed her gratitude before stating that she and her friends might won't be able to escape from the time loop they currently stuck into, goes so far stating that neither Magichron, Horologium Chamber's clock, nor even Time Demon has the power to help them. This greatly surprised Akko, as no one except her and her friends who know about the time loop. Molly on the other hand, had anticipated the Japanese's reaction as she noted that even Diana couldn't determine the mastermind behind the time loop, revealing herself to be the one who tricked Akko to break the seal of Horologium Chamber in the first place- She did so in order to regain her memories and powers that sealed within, giving her another chance to finish what she had started. Molly further explained that her said memories and power were broken into seven fragments where each of them were sealed in seven different locations that Akko correctly deduced as regions accessible via. Sealed Door of Horologium Chamber, adding that Akko and co. had unknowingly brought those pieces with her along with a set of old classic witch outfit that used to be hers.
Molly then requested Akko her assistance to break the final seal of Horologium Chamber, but Akko, sensing something definitely wrong in the blue-haired girl, demanded her familiarity with the legendary chamber in the first place and whether she really Molly. At this point, it comes to light that something had possessed Molly, as she revealed herself to be "the loser who became afflicted with the Curse of Time and turned into the Ghost Witch". Akko, unaware with malevolent forces that had corrupted Molly and the threat it posed to her, attempted to reason with her, but Molly responded by lashing out on the Japanese, crying out how Akko could boast about her dream while she herself believed her dreams are over. Having enough, Molly attacks Akko only to be interrupted by Ursula who noticed something amiss. This forced Molly to retreat, but not before scattered Akko's Chariot Cards both to make Akko feel the same despair that she felt and to cover her escape.
Putting Pieces Together
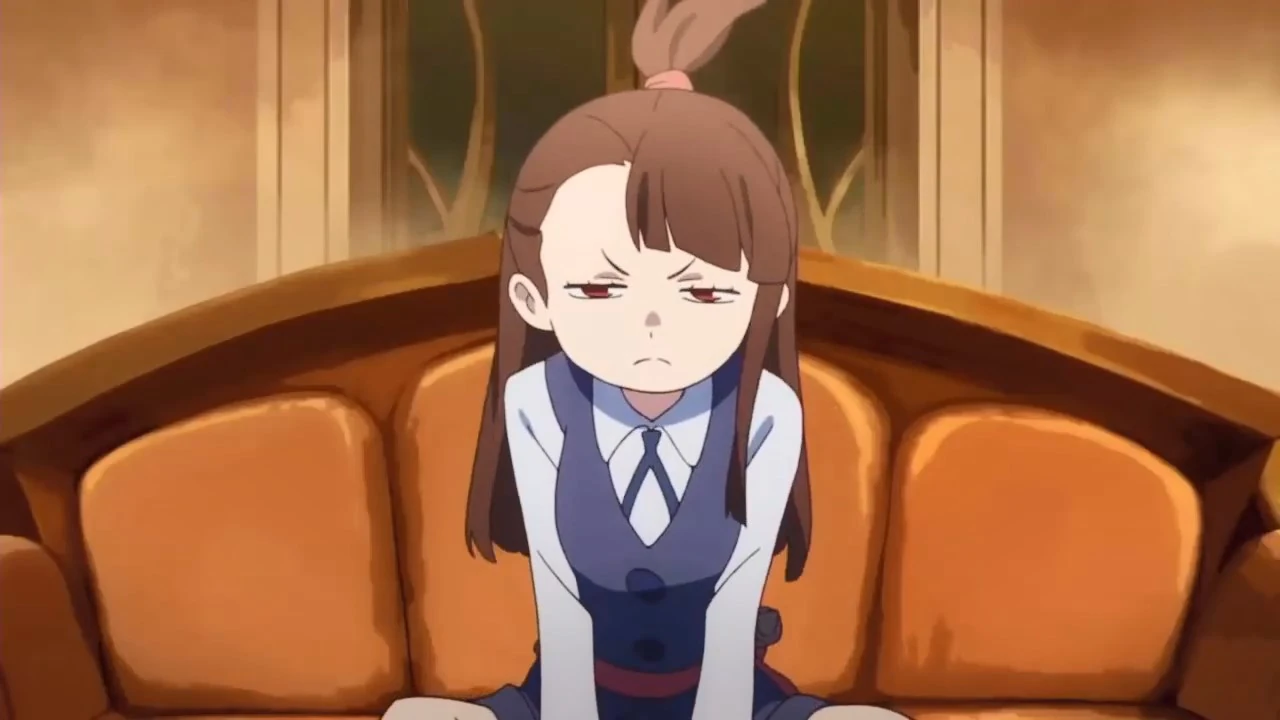
Akko is devastated by the loss of her Chariot Cards, and it became apparent that their situation is far worse than the gang believed. With Ursula now inadvertently involved in the crisis, Akko and Diana reluctantly explained their recent adventures along with failed attempts restore the flow of time. Though horrified that the gang had attempted to handle the matter with their own hands in spite of its apparent dangers, Ursula decided to lend a hand but in condition not to involve other professors. Amanda then asked Akko what their next move would be, in which Akko replied that she will try to reason with Molly again, but unsure with her current whereabout. Diana pointed out that Molly is likely behind the "true chamber" behind the Sealed Door of Horologium Chamber, the one that doesn't need Magic Key to access it, and expressed her suspicion that Molly might has something to do with the Final Wonder as well.
Unsure whether Molly had slipped into Horologium Chamber for the Sealed Door in the confusion during the previous time loop, Akko inquired Elsa and Amelia about her whereabouts. Due to the time loop, they had no recollection about their argument with Molly and are worried about her well-being. Akko then promised the two that she'll find Molly.
Taking her time between recovering her scattered Chariot Cards, Akko checks on Ursula's progress in investigating the school records at the library. At first, Ursula had no luck in her research and considering about continuing her research at Ancient Archives until Akko mentioned a vital information: The Ghost in the Library which said to once a Luna Nova student from the Golden Age of Magic. After a while, Akko decided to check Ursula's progress again in time too see her putting all pieces together: There was an incident that took place at Luna Nova during the Golden Age of Magic where a witch had lost control over her own power which resulted her transformed into a monster called Ghost Witch. In response of this, Luna Nova professors sealed her into seven fragments behind the Sealed Door of Horologium Chamber. Continuing the research, the Astronomy teacher deduced that the said student was none other than Molly herself, as she had attended Luna Nova for more than two centuries. However, the reason why no one noticed it was due to memories pertaining her periodically reset (estimated to be once a year), an occurence which similar with the gang, except that Molly's memories also reset as well.
The Ghost in the Library Revealed

The gang vs. Molly-Ghost Witch
Though they are not completely sure with their findings, one thing is certain: Molly, or possibly her corrupted form, is within the true chamber behind the Sealed Door. Following Ursula's suggestion to use the magic of Shiny Rod, Akko forced the Sealed Door open with Shiny Arc so she and her friends can enter while Ursula stayed behind near the Sealed Door.
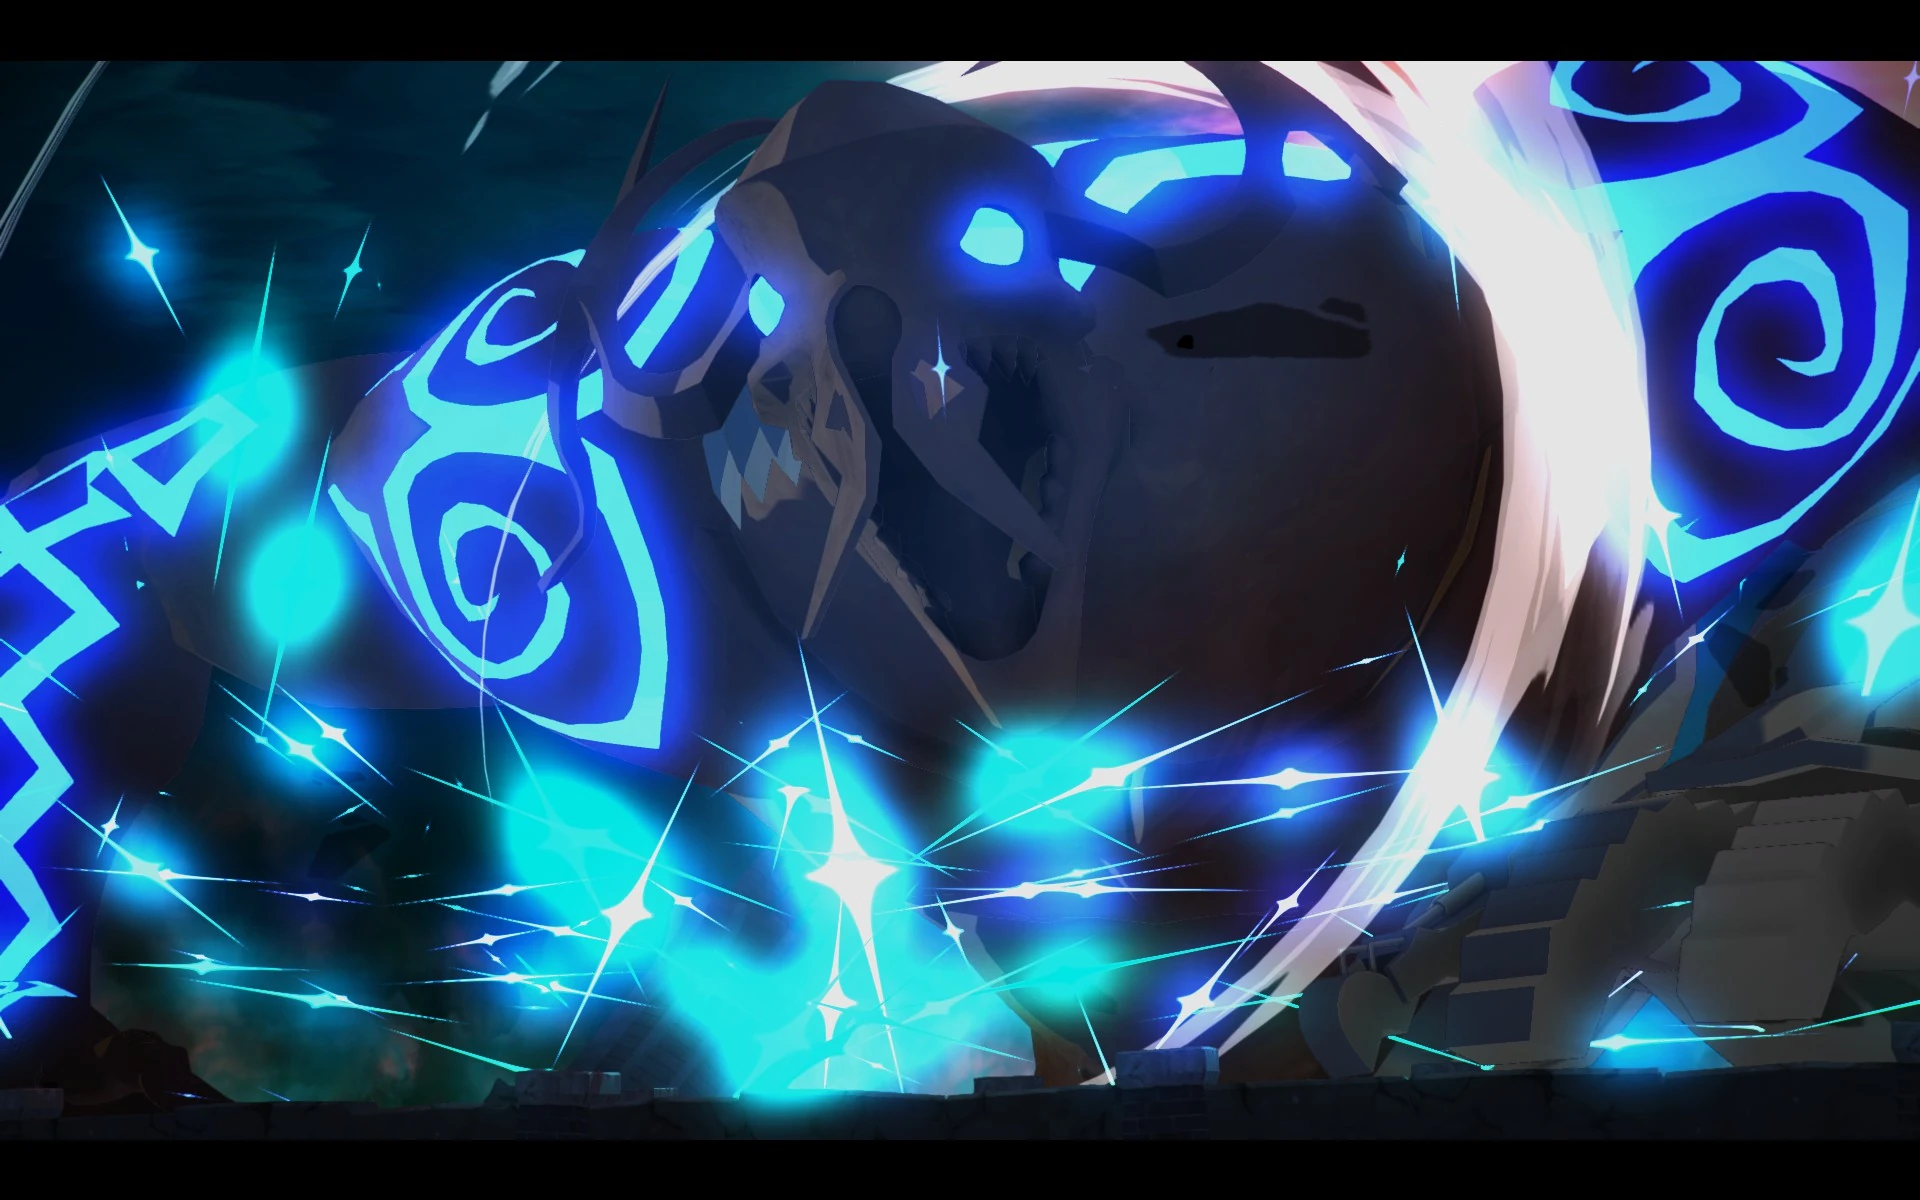
As soon as Akko and the gang enter the said chamber, which revealed to be a large space with nothing but stars, floating ornate circles, and a large rock the witch students stood upon, they immediately greeted by the angry Ghost Witch-Molly herself. The Ghost Witch-Molly proved herself much more powerful than any monsters Akko and her companions previously fought, as she wields immensely powerful elemental magic in her disposal. To compound the issue, by the time the gang finally gained the upper hand, the skeletal entity turned the tide of their battle by summoning elemental crystals which render her invincible. However, the destruction of the crystals proved to be harmful for the Ghost Witch-Molly, a weakness which Akko and her friends immediately exploited to take her down. With that, they managed to defeat the skeletal entity and bringing Molly back to the Hall of Horologium Chamber.


Molly awakes
In spite of their success, Molly still remain unconscious for some reasons, which greatly concerned Akko. Sucy's remark of the teal blue-haired girl might disappeared along with the Ghost Witch doesn't help either, until the Japanese recalled upon the Final Wonder that yet to be solved: The Ghost in the Library. Realizing that the alleged ghost might actually Molly's astral form, Akko immediately set out for the library and called out for her, much to Lotte's confusion. True to her suspicion, the alleged ghost is confirmed to be the disembodied soul of Molly herself. Having returned to her sense of self and horrified with what she had done, Molly is afraid to return to her body, leta lone facing her roommates again. Akko reassured that apologizing to Elsa and Amelia won't be a big deal in spite of them unlikely have recollection over their arguments earlier by the time she met them. Akko's encouragement, coupled with the fact that Elsa and Amelia genuinely worried about her, prompted the surprised Molly to teleport back to her body, startling the Japanese that she quickly returned to the Hall of Horologium Chamber.
Upon returning to her body, Molly decided to tell the gang how she became the Ghost Witch in the first place upon inquired by Diana; Back during the Golden Age of Magic when she first stepped into Luna Nova, Molly revealed to be poor in magic, earning her ridicule from others. One day however, she stumbled upon Horologium Chamber and used the Time Magic within to help improving her magical skills. In spite of this improvement however, Molly, unable to tell anyone about Horologium Chamber, isolated herself from her peers and became lonely as result. Seeking to change that, Molly made a fatal mistake by attempting to use the Time Magic of Horologium Chamber to went back in time to the day she entered Luna Nova, resulting her spirit existing outside the normal flow of time and ultimately corrupted her into the Ghost Witch that threatened the academy. This of course, prompted the professors of Luna Nova at that time imprisoned her corruped form behind the Sealed Door of Horologium Chamber and having her powers and memories split into seven fragments (the very fragments Akko and her companions later unknowingly recovered through exploring seven regions accessible with Magic Keys) in order to prevent her from causing any harm, though the process resulted her real self existing as a ghost who continued the cycle of the Curse of Time.
After telling her story, Molly requested Ursula to imprison her back into Horologium against Akko's wishes. Fortunately, Ursula reassured that it no longer necessary with Diana added that the seal which imprisoned Molly's Ghost Witch form was partly created to break the Curse of Time that corrupted her to begin with, and with the curse has finally broken, Molly now a fully restored human with her Ghost Witch persona destroyed for good, something that planned by the professors all along. Ursula also reassured that punishing Molly is no longer necessary since attending Luna Nova for 200 years is enough as remainder of her mistake. With that, Molly finally let go of the guilt and to everyone's relief, the time loop also broken due to it being part of failsafe measure should the seal that containing Ghost Witch broken- Since they had both broken the seal and lifted the curse that created Ghost Witch, the flow of time has returned to normal.
After sealing the Horologium Chamber for good, Ursula found the ominous book that started it all where to her and Akko's surprise, they found a rare "Horologium Chamber" Chariot Card beta underneath it. This unexpected discovery greatly surprised Akko who immediately assume it to be the alleged secret treasure hidden behind the Sealed Door. Molly, who also surprised as much as Akko, immediately apologized for scattering the cards all over the campus, at which Akko reassured she already retrieved them all and now wanted to add the beta card into her collection. Akko's excitement soon dropped upon realizing that she still had to arrange the books in the library, though to her relief, her friends, including Molly and even Ursula herself, offered to help her in the said endeavor (though Sucy is the only one who least thrilled by this).
Epilogue

In the end, life returned to normal in Luna Nova. Akko, Lotte, and Sucy are discussing what would they do on the next day off, in which Akko suggessed to buy some ice cream at Blytonbury in the spot Jasminka knows the best. The Japanese noticed that Sucy is arranging some order for venomous wasps that she sought for another of her experiments. Just then, Akko noticed Molly who walking with Elsa and Amelia while smiling and chatting together, with Akko can't help but smile as her friend now able to live a life she always wanted in their academy.
Gameplay
Little Witch Academia: Chamber of Time is a side-scrolling action adventure game which features multiple characters from the series as playable characters.[7] Luna Nova Magical Academy can be explored and magic-infused attacks are used to navigate through monster-filled dungeons. There are two distinct game modes: a 3D adventure-style exploration of the school, and a 2.5D action mode involving the exploration of magical labyrinths with three characters. The game features animated cutscenes by Studio Trigger, the creators of the anime series. Scores from the series' original soundtrack are included in the game as well.
Walkthrough
See: Little Witch Academia: Chamber of Time Walkthrough and Guide in Neoseeker.com


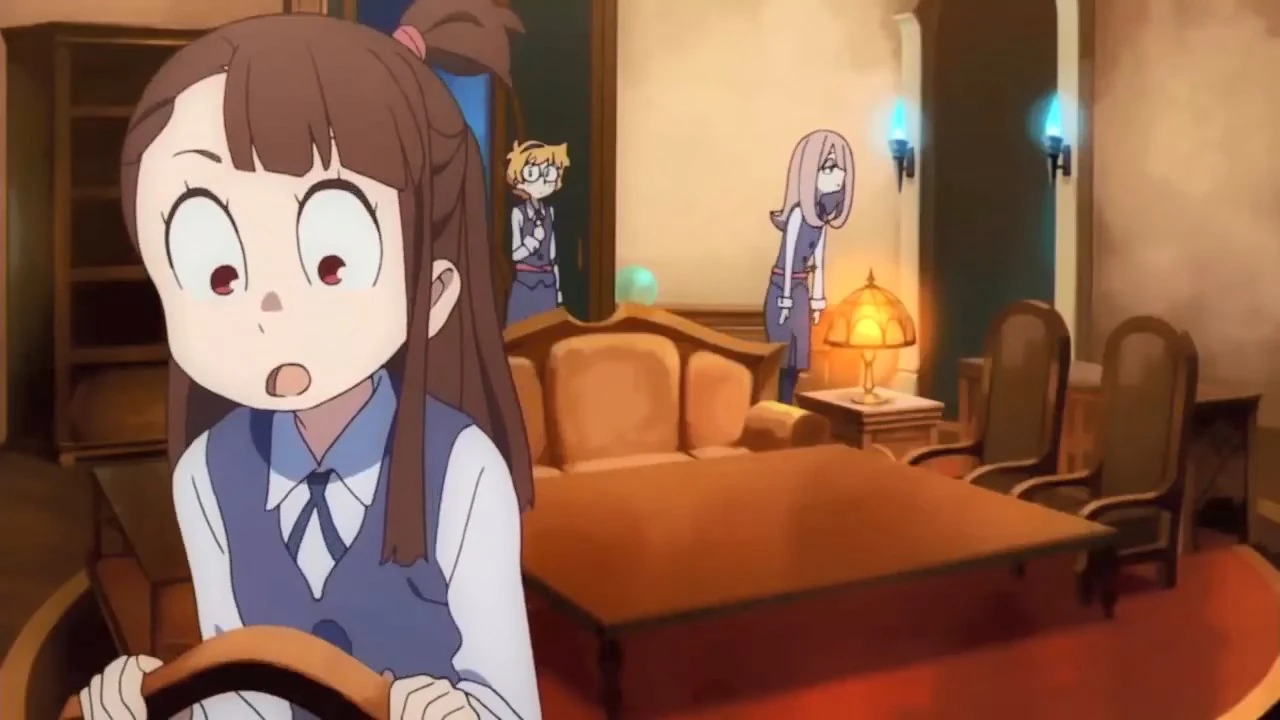
Main Event (left) and Sub Event (right)
The game's walkthrough progress is split into Main Event (marked by red exclamation mark) and Sub Events (yellow exclamation mark). Whereas the Main Event required to complete the game, the Sub Event is outright optional, though some are crucial in gaining an edge to complete the main Event.
Sub Events
See: Sub Events
Sub Events refers to requests that Akko received over the course of the events of the game. While the sub-events technically optional to finish the game, some of its rewards can give the edge for the player in their progress in finishing it.
Party Roster
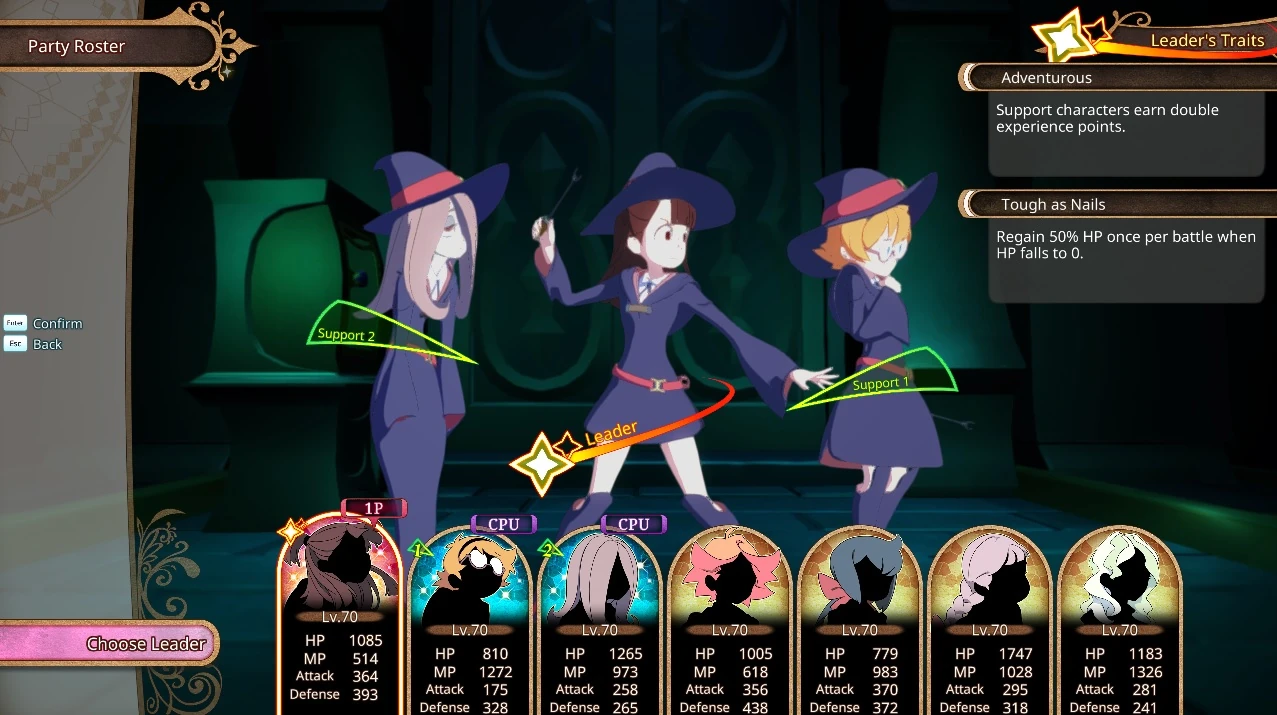
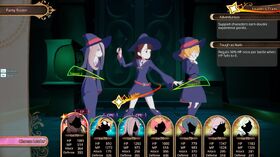
Party Roster screen
Party roster is where the player can choose the party leader (which player controls) and two supporting members who will act of their own accord. Keep in mind that each character has their own leadership traits, so make sure to take those into consideration if the player wanted to use it for their advantage.
Here are the list of playable characters and their respective leadership traits:
| Character | Leadership Trait 1 | Leadership Trait 2 |
|---|---|---|
| Akko | Adventurous: Support characters earn double experience points. | Tough as Nails: Regain 50% HP once per battle when HP falls to 0. |
| Lotte | Spirit Navigator: Spirit reveal the location of hidden chests. Press the spell button to dig the chest out. | Mystic Slayer: Deal additional damage to mystic monster. |
| Sucy | Fungus Finder: Gain party buffs by touching mushrooms that appear while adventuring. | None |
| Amanda | Thief's Discipline: Collect double luna and experience points after completing a dungeon. | None |
| Constanze | Stanbot: A Stanbot assists Constanze in battle. | Clockwork Slayer: Deal additional damage to clockwork monsters. |
| Jasminka | Quick Healer: Regain party HP when entering a new area. | None |
| Diana | Living Bestiary: View select monster stats. | Commander: Party gains a boost to all stats except Drop Luck, which fails. |
Horoscope Systems and Level Up
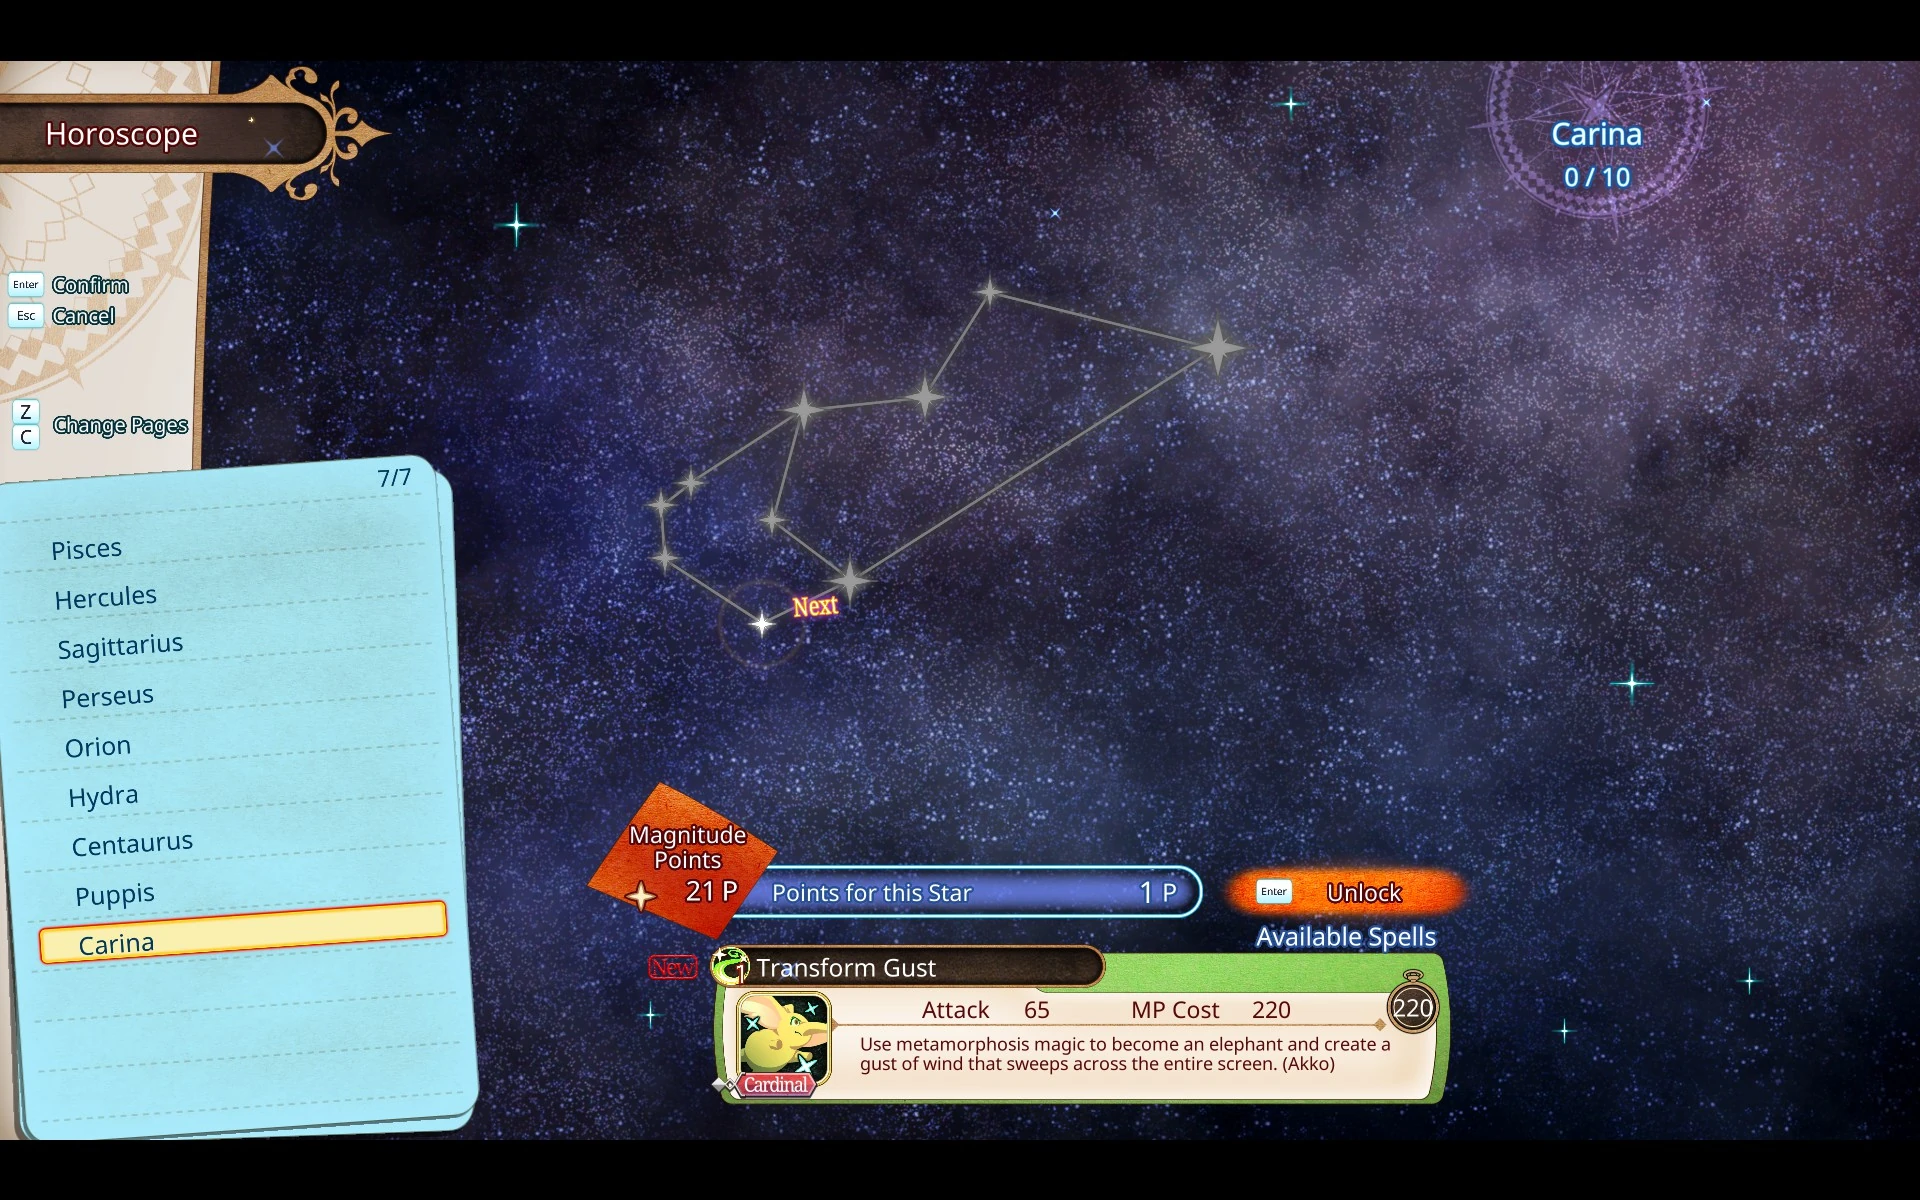

Horoscope System
Once you managed to complete a dungeon, you gain EXP and items. EXP helps you level up, which will unlock new magic spells and increase your stats. Learning new spells, as well as improving spells, is done through the ‘Horoscope System’. By opening up the stars with the ‘Magic Points’ gained when leveling up, you will be able to learn new spells. As your fill out the constellation, the magic will become stronger.
Here are list of star constellations and spells withing them:
| No. | Constellation | Spell | Location |
|---|---|---|---|
| 1. | Fornax | Fireball | Already unlocked |
| 2. | Equuleus | Stone Needle | Already unlocked |
| 3. | Apus | Wind Arrow | Already unlocked |
| 4. | Coma Berenices | Heal | Already unlocked |
| 5. | Crux | Thunderbolt | Unlocked after clearing Canopus Ruins |
| 6. | Hydrus | Dream Wind | Unlocked after clearing Canopus Ruins |
| 7. | Microscopium | Gravity Orb | Unlocked after clearing Canopus Ruins |
| 8. | Phoenix | Flaming Arrow | Unlocked after clearing Canopus Ruins |
| 9. | Ursa Minor | Shiny Arc | Unlocked after clearing Canopus Ruins |
| 10. | Mensa | Mana Tap | Unlocked after clearing Mimosa Forest |
| 11. | Musca | Gravity Binding | Unlocked after clearing Mimosa Forest |
| 12. | Volans | Cure | Unlocked after clearing Mimosa Forest |
| 13. | Reticulum | Hexflame | Unlocked after clearing Mount Ankaa |
| 14. | Ara | Regeneration | Unlocked after clearing Mimosa Forest |
| 15. | Leo Minor | Flame Strike | Unlocked after clearing Mount Ankaa |
| 16. | Cassiopeia | Flame Shield | Unlocked after clearing mount Ankaa |
| 17. | Camelopardalis | Curse Shield | Unlocked after clearing Mimosa Forest |
| 18. | Ophiuchus | Path of Cinders | Unlocked after clearing Mount Ankaa |
| 19. | Cepheus | Mark of Flame | Unlocked after clearing Mount Ankaa |
| 20. | Canes Venatici | Rock Fist | Unlocked after clearing Regulus Mines |
| 21. | Dorado | Ice Javelin | Unlocked after clearing Regulus Mines |
| 22. | Scutum | Earth Strike | Unlocked after clearing Regulus Mines |
| 23. | Antlia | Stone Wave | Unlocked after clearing Regulus Mines |
| 24. | Tucana | Earth Shield | Unlocked after clearing Regulus Mines |
| 25. | Canis Minor | Weakness Bomb | Unlocked after clearing Shaula Desert |
| 26. | Vulpecula | Dancing Wind | Unlocked after clearing Shaula Desert |
| 27. | Triangulum | Wind Strike | Unlocked after clearing Shaula Desert |
| 28. | Delphinus | Windstorm | Unlocked after clearing Shaula Desert |
| 29. | Chamaeleon | Wind Shield | Unlocked after clearing Shaula Desert |
| 30. | Circinus | Ice Bind | Unlocked after clearing Gienah Tundra |
| 31. | Sextans | Frost Strike | Unlocked after clearing Gienah Tundra |
| 32. | Corvus | Ice Shield | Unlocked after clearing Gienah Tundra |
| 33. | Piscis Austrinus | Frost Spiral | Unlocked after clearing Gienah Tundra |
| 34. | Norma | Icy Embrace | Unlocked after clearing Gienah Tundra |
| 35. | Telescopium | Shattering Bolt | Unlocked after clearing Labyrinth of Pollux |
| 36. | Aries | Taunt | Unlocked after defeating the Time Demon for the second time |
| 37. | Horologium | Reflecting Armor | Unlocked after clearing Labyrinth of Pollux |
| 38. | Pictor | Thunder Cloud | Unlocked after defeating the Time Demon for the second time |
| 39. | Auriga | Shutdown | Unlocked after clearing Labyrinth of Pollux |
| 40. | Grus | Spellsap Circle | Unlocked after defeating the Time Demon for the second time |
| 41. | Bootes | Lifesap Circle | Unlocked after defeating the Time Demon for the second time |
| 42. | Corona Australis | Earth Buster (Akko Only) | Inside the secret treasure room behind the stairs in the first-floor hallway, hidden inside the bronze chest |
| 43. | Libra | Spirit Breath (Lotte Only) | Inside the secret treasure room at the Spiral Stairs of Luna Nova Tower, inside the bronze chest |
| 44. | Cancer | Poison Bomb (Sucy Only) | Inside the secret treasure room in the Teachers’ House, hidden in a mouse hole, inside the bronze chest |
| 45. | Lynx | Passionate Dance (Amanda Only) | Inside the secret treasure room in East Laundry, hidden in a mouse hole, inside the bronze chest |
| 46. | Monoceros | Laser Blast (Constanze Only) | Inside the secret treasure room behind the troll guarding the room on the third-floor hallway, inside the bronze chest |
| 47. | Columba | Catering Party (Jasminka Only) | Inside the secret treasure room in the sewers, hidden in the mouse hole, inside the bronze chest |
| 48. | Corona Borealis | Stormbringer (Diana Only) | Inside the secret treasure room behind the troll guarding the room in the West Dormitory hallway, inside the bronze chest |
| 49. | Sagitta | Tornado Shot | Inside the secret treasure room in East Laundry, hidden in a mouse hole, inside the silver chest |
| 50. | Lyra | Steel Wind | Inside the secret treasure room in the Teachers’ House, hidden in a mouse hole, inside the silver chest |
| 51. | Lupus | Icy Dawn | Inside the secret treasure room behind the stairs in the first-floor hallway, hidden inside the silver chest |
| 52. | Pegasus | Lightning Spear | Inside the secret treasure room in the sewers, hidden in the mouse hole, inside the silver chest |
| 54. | Cygnus | Freezing Wave | Inside the secret treasure room behind the troll guarding the room on the third-floor hallway, inside the silver chest |
| 55. | Aquila | Ring of Destruction | Inside the secret treasure room behind the troll guarding the room in the West Dormitory hallway, inside the silver chest |
| 56. | Crater | Flare Splash | Inside the secret treasure room at the Spiral Stairs of Luna Nova Tower, inside the silver chest |
| 57. | Leo | Sandstorm | Inside the secret treasure room behind the stairs in the first-floor hallway, hidden inside the gold chest |
| 58. | Serpens | Gravity Blast | Inside the secret treasure room in the sewers, hidden in the mouse hole, inside the gold chest |
| 59. | Aquarius | Judgement Rain | Inside the secret treasure room in the Teachers’ House, hidden in a mouse hole, inside the gold chest |
| 60. | Canis Major | Shatter | Inside the secret treasure room in East Laundry, hidden in a mouse hole, inside the gold chest |
| 61. | Scorpius | Flame Shot | Inside the secret treasure room behind the troll guarding the room on the third-floor hallway, inside the gold chest |
| 62. | Draco | Draconic Volcano | Inside the secret treasure room behind the troll guarding the room in the West Dormitory hallway, inside the gold chest |
| 63. | Eridanus | Rapid Fire | Inside the secret treasure room at the Spiral Stairs of Luna Nova Tower, inside the gold chest |
| 64. | Sculptor | Rain of Icicles | Unlocked after fully upgrading Piscis Austrinus |
| 65. | Capricornus | Stonefall | Unlocked after fully upgrading Canes Venatici |
| 66. | Pavo | Black Hole | Unlocked after fully upgrading Musca |
| 67. | Lacerta | Spark Flare | Unlocked after fully upgrading Reticulum |
| 68. | Gemini | Earthen Spikes | Unlocked after fully upgrading Antlia |
| 69. | Lepus | Circle of Healing | Unlocked after fully upgrading Coma Berenices |
| 70. | Cetus | Meteor Crash | Unlocked after fully upgrading Crater |
| 71. | Virgo | Whiteout | Unlocked after fully upgrading Cygnus |
| 72. | Andromeda | Volcanic Ray | Unlocked after fully upgrading Ophiuchus |
| 73. | Taurus | Spirit Lullaby (Lotte Only) | Unlocked after fully upgrading Libra |
| 73. | Pisces | Sucy’s World (Sucy Only) | Unlocked after fully upgrading Cancer |
| 74. | Hercules | Flame Rondo (Amanda Only) | Unlocked after fully upgrading Lynx |
| 75. | Sagittarius | Grand Charion (Constanze Only) | Unlocked after fully upgrading Monoceros |
| 76. | Perseus | Gravitron Omega (Jasminka Only) | Unlocked after fully upgrading Columba |
| 77. | Orion | Fiery Barrage (Diana Only) | Unlocked after fully upgrading Corona Borealis |
| 78. | Hydra | Shiny Ballista (Akko/Lotte/Sucy, Spell must be cast by Akko) | Unlocked after fully upgrading Ursa Minor |
| 79. | Centaurus | Magical Parade (Amanda/Constanze/Jasminka, Spell must be cast by Amanda) | Unlocked after clearing Level 75 in the Underground |
| 80. | Puppis | Shine Explosion (Diana/Akko, Spell must be cast by Diana) | Unlocked after clearing Level 100 in the Underground |
| 81. | Carina | Transform Gust (Akko Only) | Unlocked after clearing Level 50 in the Underground |
Enchantment
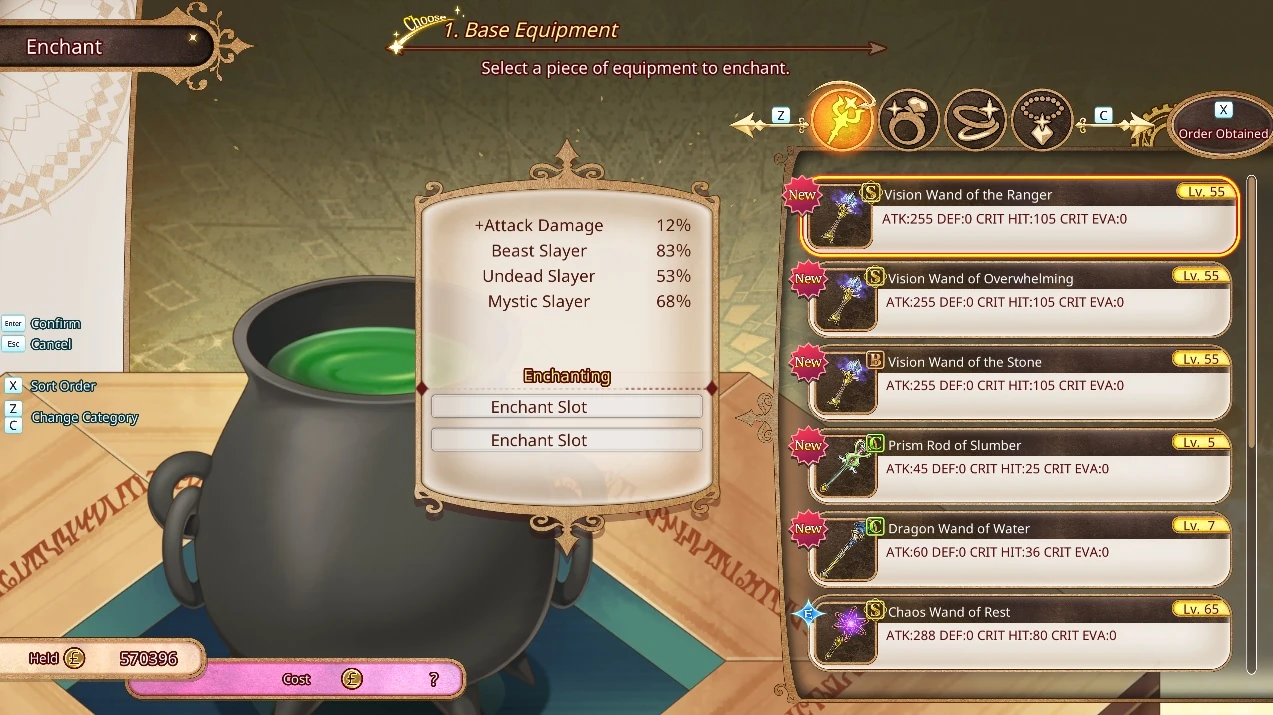
Enchant screen
Enchantment is where you can magically improve any equipped wands and accessories as well as adding new attributes with use of materials the player gathered from any of seven regions accessible via. Sealed Door of Horologium Chamber and magic keys. After choosing an item with one or more empty enchanted slots, chose one of the slots and use two different materials to add a new attribute. Mixing item costs some Lunas (the game's currency) depend on the level of the chosen item/materials in question where the higher the level of items and materials used in enchantment, the more the cost of enchantment. Enchanting items also revolves trial and errors, as new attributes that added into used item not always beneficial, so keep in mind that different recipes yields different results.
Characters
Playable
- Akko Kagari
- Lotte Jansson
- Sucy Manbavaran
- Amanda O'Neill
- Jasminka Antonenko
- Constanze Braunschbank-Albrechtsberger
- Diana Cavendish
Other
- Ursula Callistis
- Hannah England [8]
- Barbara Parker [9]
- Anne Finnelan
- Miranda Holbrooke [10]
- Nelson [11]
- Samantha Badcock [12]
- Lukić [13]
- Pisces
- Wangari
- Joanna
- Kimberly
- Avery
- Molly McIntyre
- Blair
- Mary
- Sarah Bernhardt
- Sora
- Rajani
- Rashmi
- Verde Shidariza
Limited edition
The following extras will be included in the Limited edition version (¥11,110):[2]
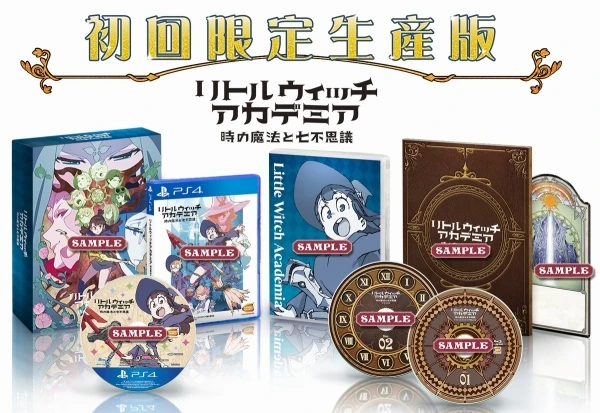

- A copy of the game
- A Trigger-illustration special-make box
- Special contents Blu-ray disc
- Drama CD
- Specially-made art book
- Game original Chariot card
[Warning] The japanese version doesn't have English translation yet !
Trivia
- Little Witch Academia: Chamber of Time is set between "Orange Submariner" and "Sleeping Sucy".
- The antidote shaped like a star with a sprout on top appears in the commercial artwork from "Pohjola's Trial", on the drawer.
Gallery
| Little Witch Academia: Chamber of Time has an associated gallery here. |
References
- ↑ Gematsu - a video game based on the Little Witch Academia series being developed by Bandai Namco. It is set for release/06/little-witch-academia-witch-time-seven-wonders-launches-november-30-japan Little Witch Academia: The Witch of Time and the Seven Wonders launches November 30 in Japan by Sal Romano 06.25.17 at 01:02 PM EDT
- ↑ 2.0 2.1 2.2 Gematsu - Little Witch Academia: The Witch of Time and the Seven Wonders launches November 30 in Japan by Sal Romano 06.25.17 at 01:02 PM EDT
- ↑ Gematsu - Little Witch Academia: Chamber of Time coming to the Americas for PS4, PC in early 2018 by Sal Romano 07.01.17 at 01:00 PM EDT
- ↑ IGN - Little Witch Academia: Chamber of Time Release Date Announced By Alex Osborn 16 Mar 2018
- ↑ PlayStation Blog - [1]
- ↑ Gematsu - Little Witch Academia: Chamber of Time details Horologium Chamber, game flow by Sal Romano 07.19.17 at 05:40 AM EDT
- ↑ Gematsu - Little Witch Academia: The Witch of Time and the Seven Wonders adds playable Lotte and Sucy by Sal Romano 6.20.17 at 08:45 AM EDT
- ↑ https://twitter.com/HDKirin/status/907988202056589312
- ↑ https://twitter.com/HDKirin/status/907988202056589312
- ↑ http://www.siliconera.com/2017/08/28/little-witch-academia-shows-off-professors-locations-subquests/
- ↑ http://www.siliconera.com/2017/08/28/little-witch-academia-shows-off-professors-locations-subquests/
- ↑ http://www.siliconera.com/2017/08/28/little-witch-academia-shows-off-professors-locations-subquests/
- ↑ http://www.siliconera.com/2017/08/28/little-witch-academia-shows-off-professors-locations-subquests/
External links
- Bandai Namco - Little Witch Academia: Chamber of Time official game site
- Info
- PC Gaming Wiki - Little Witch Academia: Chamber of Time
- PS4
- PlayStation.com - PS4: Little Witch Academia: Chamber of Time
- Steam (PC)
- Steam Store - Little Witch Academia: Chamber of Time
- Reviews
- Anime News Network - Game Review: Little Witch Academia: Chamber of Time by Todd Ciolek, May 23rd 2018
- Crunchyroll news - REVIEW: Is "Little Witch Academia: Chamber of Time" a Worthy Successor to the Anime? by Jennifer Hackett May 15, 2018 9:30am PDT
- News
- PlayStation.Blog (EU) - Creating the beautiful animated cutscenes of Little Witch Academia: Chamber of Time By Florian Eichenauer 17 April 2018
- SiliconEra - Little Witch Academia: Chamber Of Time’s Version 1.03 Update Adds Online And Offline Co-Op By Alistair Wong . March 20, 2018 . 4:00pm
- PlayStation.Blog - Little Witch Academia: Chamber of Time Arrives on PS4 May 15th by Randy Le Mar 16, 2018
- Crunchyroll news - "Little Witch Academia" Game Previewed in New Set of English Screens by Joseph Luster January 27, 2018 12:33pm PST
- RPG Site news - Little Witch Academia: Chamber of Time listed with a February 20 release date by Adam Vitale, 17 January, 2018
- 2017 news
- Gematsu - Little Witch Academia: Chamber of Time version 1.01 update detailed by Sal Romano 11.29.17 at 04:52 AM EDT
- Otaku News - An Interview with Little Witch Academia Creators By: Joe 2017 November 6th Monday [14:46]
- Bleeding Cool News - ‘Little Witch Academia’ Gets A New Japanese Trailer For PS4 Release by Gavin Sheehan October 23, 2017
- The Mercury news - Preview: ‘Little Witch Academia’ casts spell as a beat-’em up By Gieson Cacho September 1, 2017 at 1:07 pm
- Crunchyroll news - "Little Witch Academia" Live Stream Features Half Hour of Gameplay by Joseph Luster August 20, 2017 9:44am MST
- Gematsu - 33 minutes of Little Witch Academia: Chamber of Time gameplay by Sal Romano 08.20.17 at 09:36 AM EDT